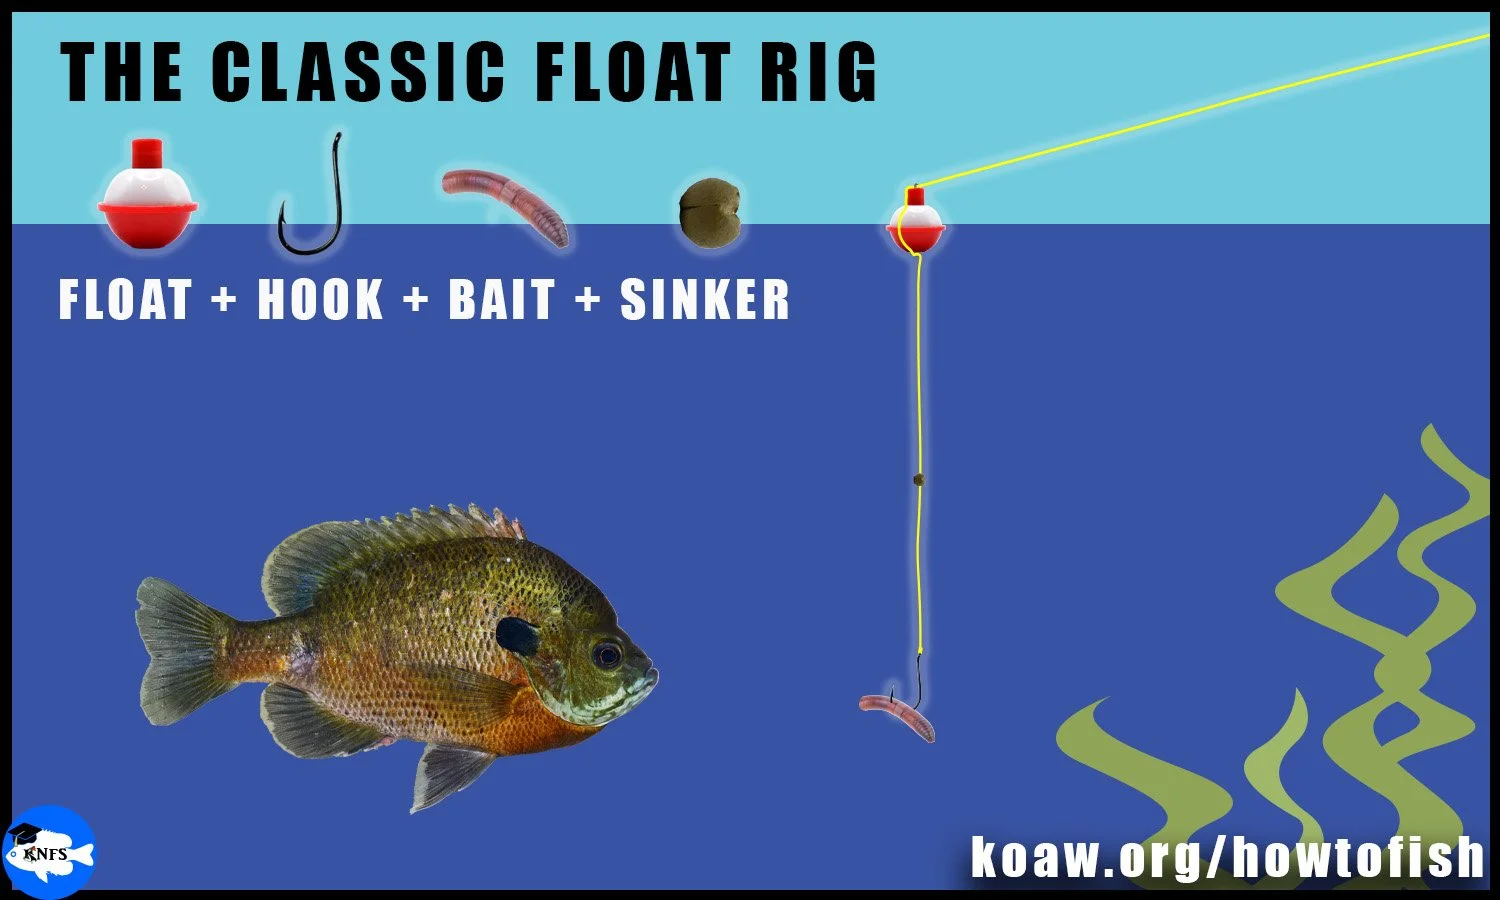
On this page we’ll go over how to construct this classic rig as well as how to play, or fish, this rig.
To tie this rig, you’ll need the following:
From the items that were covered on the ‘Starter Rigs’ page, you should have the following items:
a float
a hook
a bait
split shots (optional)
From what was covered on the ‘Basic Gear’ page, you should have the following items:
a reel on a rod
fishing line spooled onto that reel. (See KNFS YouTube video on how to spool line onto a baitcaster / spinning reel here.)
line cutters and/or pliers with line cutters (if adding split shots)
Image shows an example of an angler using the classic float rig with live earthworm as bait to catch a Channel Catfish.
WHAT FISHES WILL THIS RIG CATCH?
This rig can be fished in freshwater and saltwater, though generally used more for inland situations as other float rigs are preferred in saltwater situations.
Saltwater rigs may require larger and/or more elongated floats to help the angler see the float in water with more movement.
This rig will be difficult to play in aggressive surf.
Multispecies rig (catches many different species.)
This rig is very versatile depending on the bait:
With animal / animal-mimicking baits this rig will target predatory fishes that eat other animals (other fishes, amphibians, annelids (worms/leeches), large insects, etc.).
With corn baits / other plant-based baits this rig expands to more omnivorous fishes as well as plant-eating fishes.
This rig does well…
being cast from shoreline/boat (discussed below)
Can target various depths
We’ll discuss a shallower depth, common range around 1 ft to 6 ft (0.3 m to 1.8 m) from the surface.
Other float tying techniques will allow for targeting deeper depths (not discussed on this page.)
This rig does not do well…
being cast into any kind of structure.
This rig will snag fairly easily on plants, wood, and other structure.
being trolled from a boat unless the speed of the boat is very, very slow.
targeting deep depths.
being played in any fast-moving waters (requires adjustments / skills not discussed on this page)
HOW TO ASSEMBLE & PLAY THE CLASSIC FLOAT RIG:
How to spool your reel with line and ensure line is threaded correctly. Watch on YouTube instead.
STEP 1: LINE PREP & TIE ON HOOK
1.1 PREPARE THE LINE:
If the reel is not yet spooled, see the adjacent video to spool the reel.
Ensure that the line is threaded correctly through the level wind guide on the baitcaster, or for a spinning reel, correctly underneath the bail.
Ensure that the line is threaded through each eyelet along the shaft of the rod.
1.2 ATTACH THE LINE TO THE EYE OF THE HOOK:
Attach the hook to the fishing line via a terminal knot.
The adjacent video will show how to tie one of the simplest, strongest terminal knots in fishing, the Palomar Knot.
The complete video for instructing on this rig shows how to tie this knot with mono and/or fluoro line.
Click to enlarge. For mono and fluoro line, use a double-threading method to start instead of folding the line.
Tips for mono / fluoro line:
If attempting the Palomar Knot and you chose to use thicker line and are unable to easily thread in the folded line through the eye, simply just thread in the tag end (cut end) first, pull out some line, and thread it through again. If the line still doesn’t fit through the eyelet of the hook, then you’ll need to use a different knot that doesn’t require the double eyelet threading, like the San Diego Jam Knot.
Step 2 - Attach the float:
Let’s first think about this rig. The float will keep the hook and bait from entirely sinking to the bottom. The line distance between the float and the hook is about how deep the bottom of this rig will go.
For this demonstration, we’ll say anything greater than 6 ft (1.8 m) is deep water. We’ll say that 2 ft (0.6 m) is shallow water.
The hook and bait should be about 1’ (0.3 m) to 2’ (0.6 m) off of a bare bottom or at least 1’ (0.3 m) above plants/structure.
We want the bait off of the bottom and above structure because the bait will have better visibility to nearby fishes as well as be deep enough to target more types of fishes.
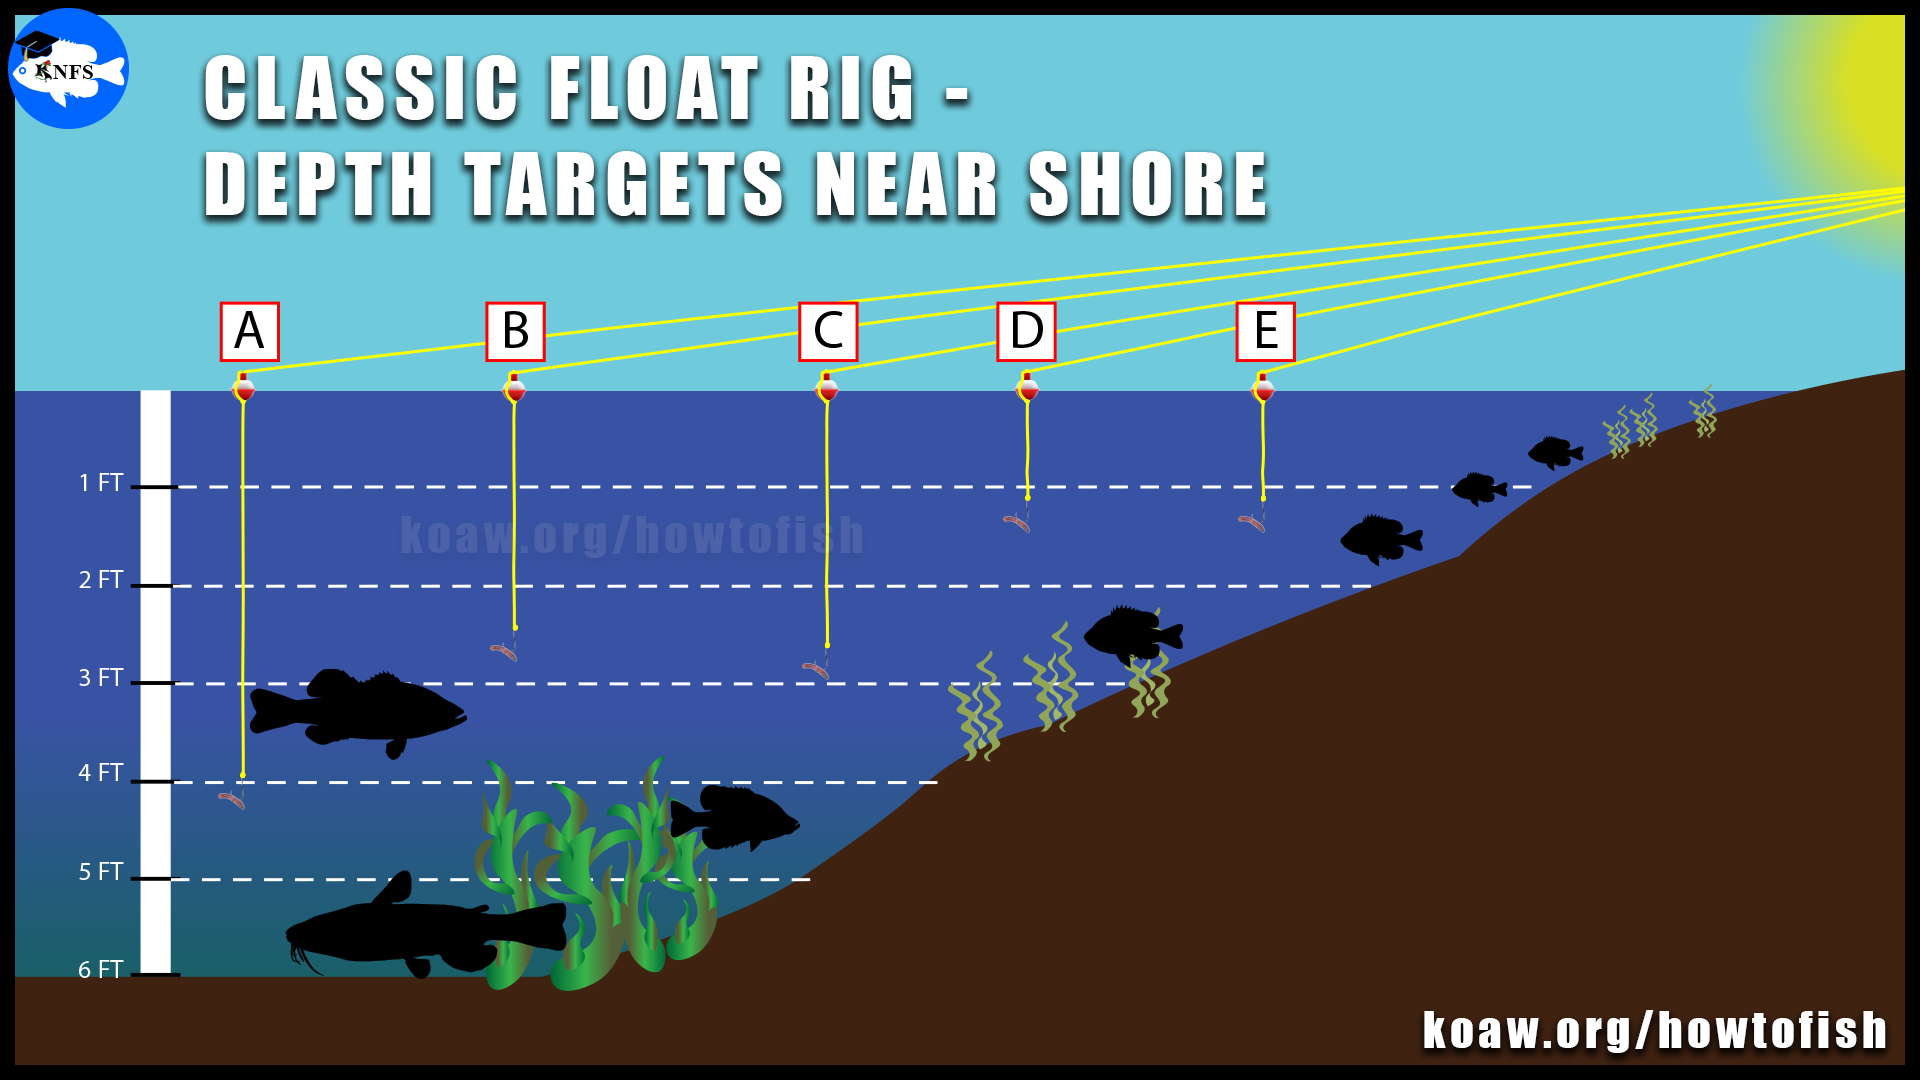
Figure shows general idea of how high to tie a float from the hook. A. At 6 ft depth over a bare bottom, the float is tied ~4 ft from the hook. B. At 6 ft depth over tall plants, the float is tied ~2.5 ft from the hook to stay ~ 1 ft over the plants. C. At 5 ft depth over bare bottom, the float is tied ~3 ft from the hook. D. At 3.5 ft depth the float is tied ~1 ft from the hook to be ~1 ft above plants. E. At ~2.5 ft depth over a bare bottom the float is tied ~ 1 ft from the hook.
2.1 DECIDE WHERE TO ATTACH THE FLOAT
For the suggested values below, the depth should be considered as the bare bottom or top of structure:
2 ft (0.6) depth then attach the float 1 ft (0.3 m) from the hook.
3 - 4 ft (0.9 - 1.2 m) depth then attach the float 2 ft (0.6 m) from the hook.
5 - 6 ft (1.5 - 1.8 m) depth (or deeper) then attach the float 3 - 4 ft (0.9 - 1.2 m) from the hook.
If you chose to cast your rig into water that is 4 ft deep and you attached your float 2 ft above the hook then your bait will be presented at a depth of 2 ft (4 - 2 = 2). That’ll do well!
An angler must make a choice as to whether or not to fully secure the float along the line of the rig.
2.2 DECIDE HOW TO ATTACH THE FLOAT
The float we have chosen (a standard snap bobber) may be secured either loosely or tightly to the line.
The float we are using is most often called a “bobber”.
Loose: Bobber will slide around the line.
Only attach bobber to line via one of the metal clasps.
Helpful when reeling if bobber is attached very far from rig.
Allows angler to keep reeling even after the bobber hits the tip of the rod.
Tight: Bobber stays fixed on the line.
Attach bobber via both bottom and top metal clasps.
Helpful to always know depth of rig.
Increases hook-setting likelihood.
2.3 ATTACH THE BAIT
Redworms are usually fairly hardy on a hook for a smaller-sized worm.
Really, you can attach anything you want to the hook. However, I will suggest attaching live earthworms or live leeches, as these will not fail.
Remember to trim your presentation.
Works great even with live earthworms.
Redworms are great to purchase. (Keep ‘em cool if you can, even if the container says something like, “No refrigeration needed.”)
Live leeches tend to die quickly if cut.
With the small hooks we are using #8-#4, buy small leeches.
If using the medium fishes package with larger hooks, buy medium leeches. (Remember to keep them cool & change the water occasionally.)
Step 3 - CASTING THE RIG:
3.1 KNOW BASIC CASTING MECHANICS:
I prepared a tutorial page on basic casting mechanics for the three rod and reel combinations most frequently used. Refresh on this casting mechanics material if needed.
This rig is most commonly used on a spincast rod/reel or a spinning rod/reel.
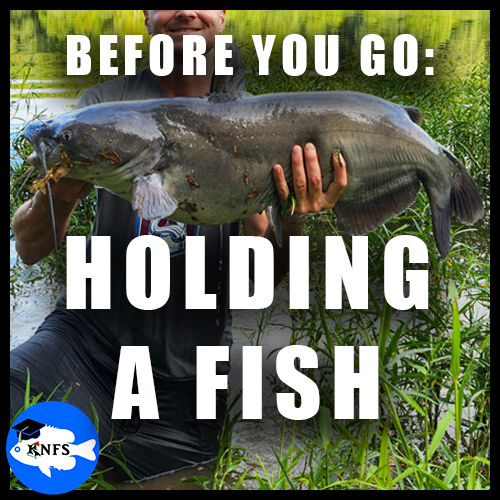
LEARN HOW TO HOLD FISH HERE
3.2 BEST HABITATS TO CAST TOWARDS:
Open water situations.
Edges of weeds, piers, wood piles, shelves, and other structure.
Allow the rig to sit close, but not too close to structure.
There is a delay in the reactionary time between the fish strike and the angler’s ability to set the hook.
If the fish takes the rig into structure, the line may snag and break.
STEP 4 - PLAYING THE RIG:
Playing, finessing, working, and other terms are used to describe the actions an angler can give to the rig to put the rig into a certain position and entice a fish to strike. Different rigs have different performance capabilities; some rigs are meant to be finessed while others are not.
With this ‘Class Float Rig’, not much playing is actually given to the bait. This is more of a wait-and-see type of rig.
WHAT A STRIKE LOOKS LIKE:
One of the useful aspects of a float rig is that there is a visual indicator (the float) that lets you know when a fish is messing with your rig.
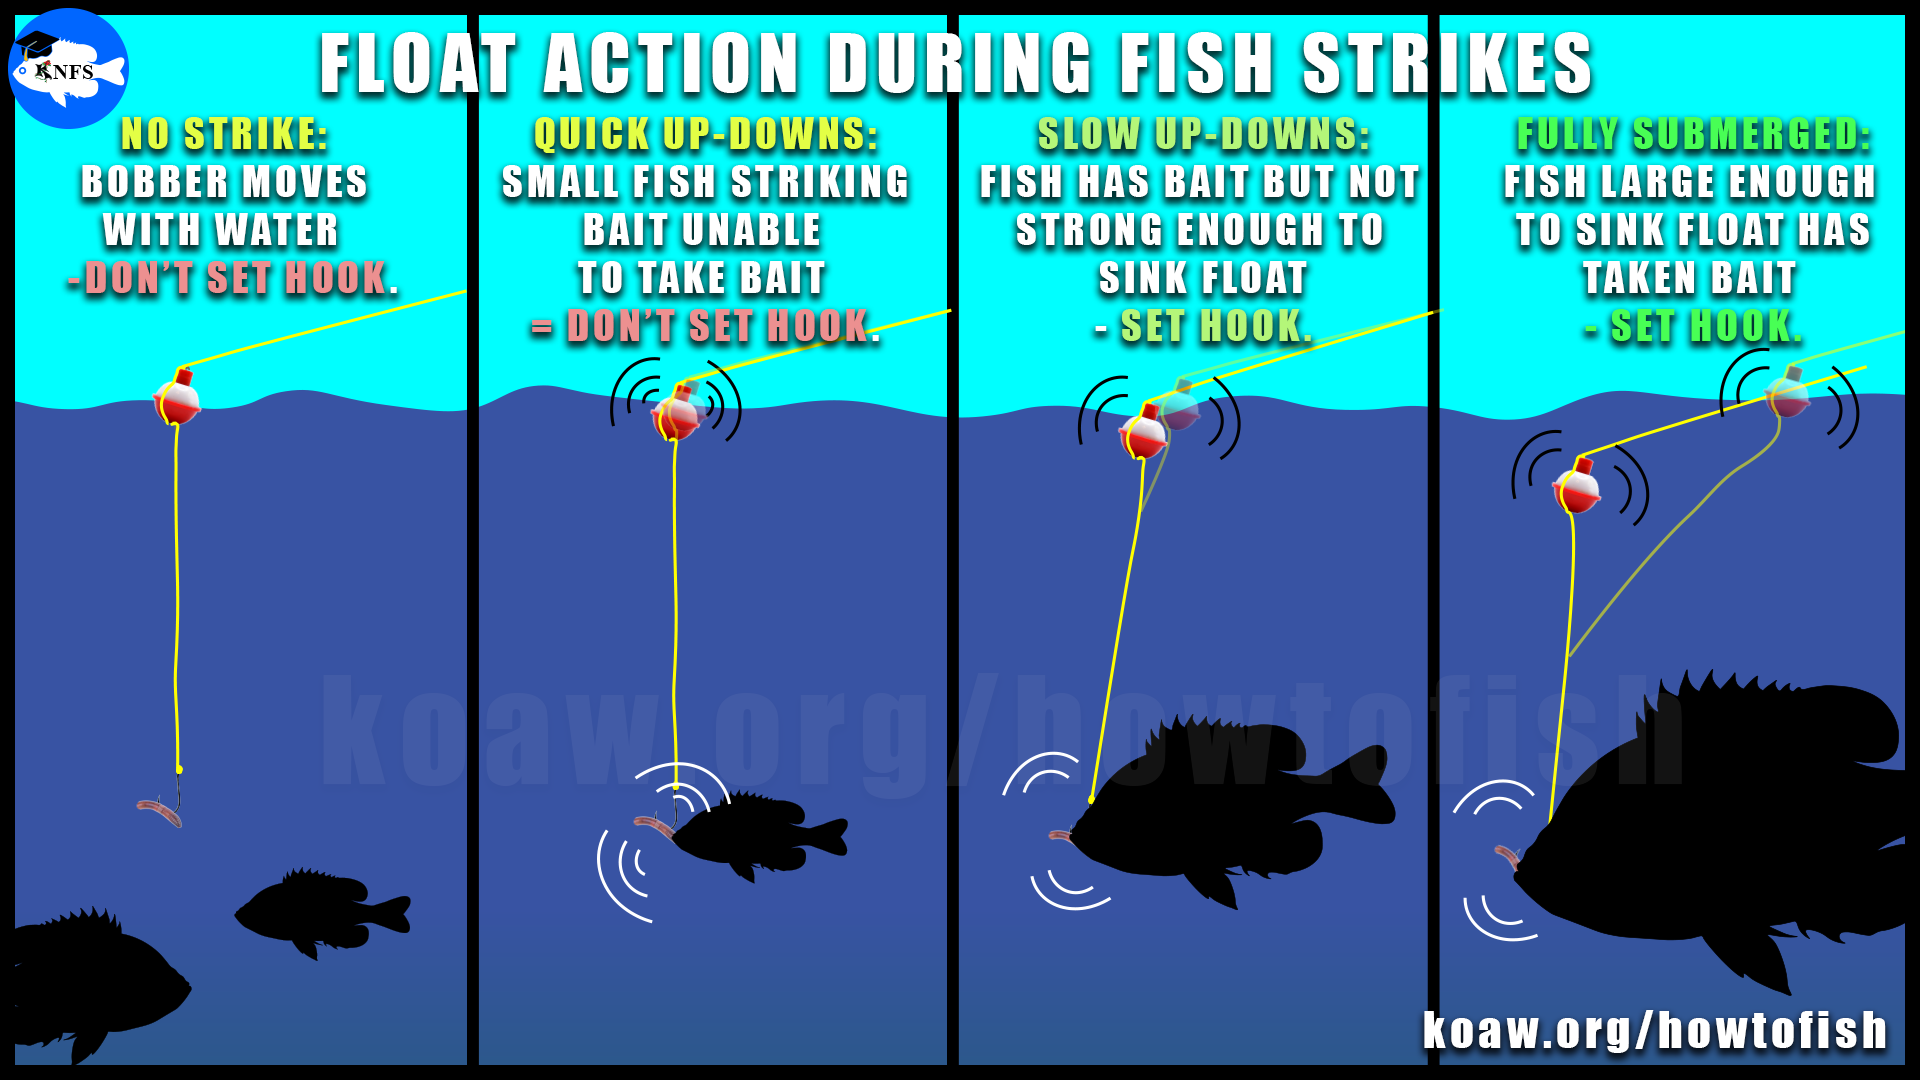
Shows the general trends of a bobber during fish strikes. Of course, these characteristics do vary, especially by species and sizes of components.
QUICK UP-DOWN: If the float quickly bobs up-and-down and returns to its normal position in the water:
The fish struck the rig, but did not get hooked and/or swim off with the bait in the mouth.
SLOW UP-DOWN: If the float is slowly bobbing up-and-down:
A small fish probably has the bait in its mouth and is swimming around, unable to fully submerge the bobber.
Set the hook on the next down motion of the float and feel if the fish is pulling back.
FLOAT FULLY SUBMERGED: If the float has fully submerged:
A fish big enough to sink the float has taken the rig.
Wait a half-second to full-second and set the hook.
SETTING THE HOOK:
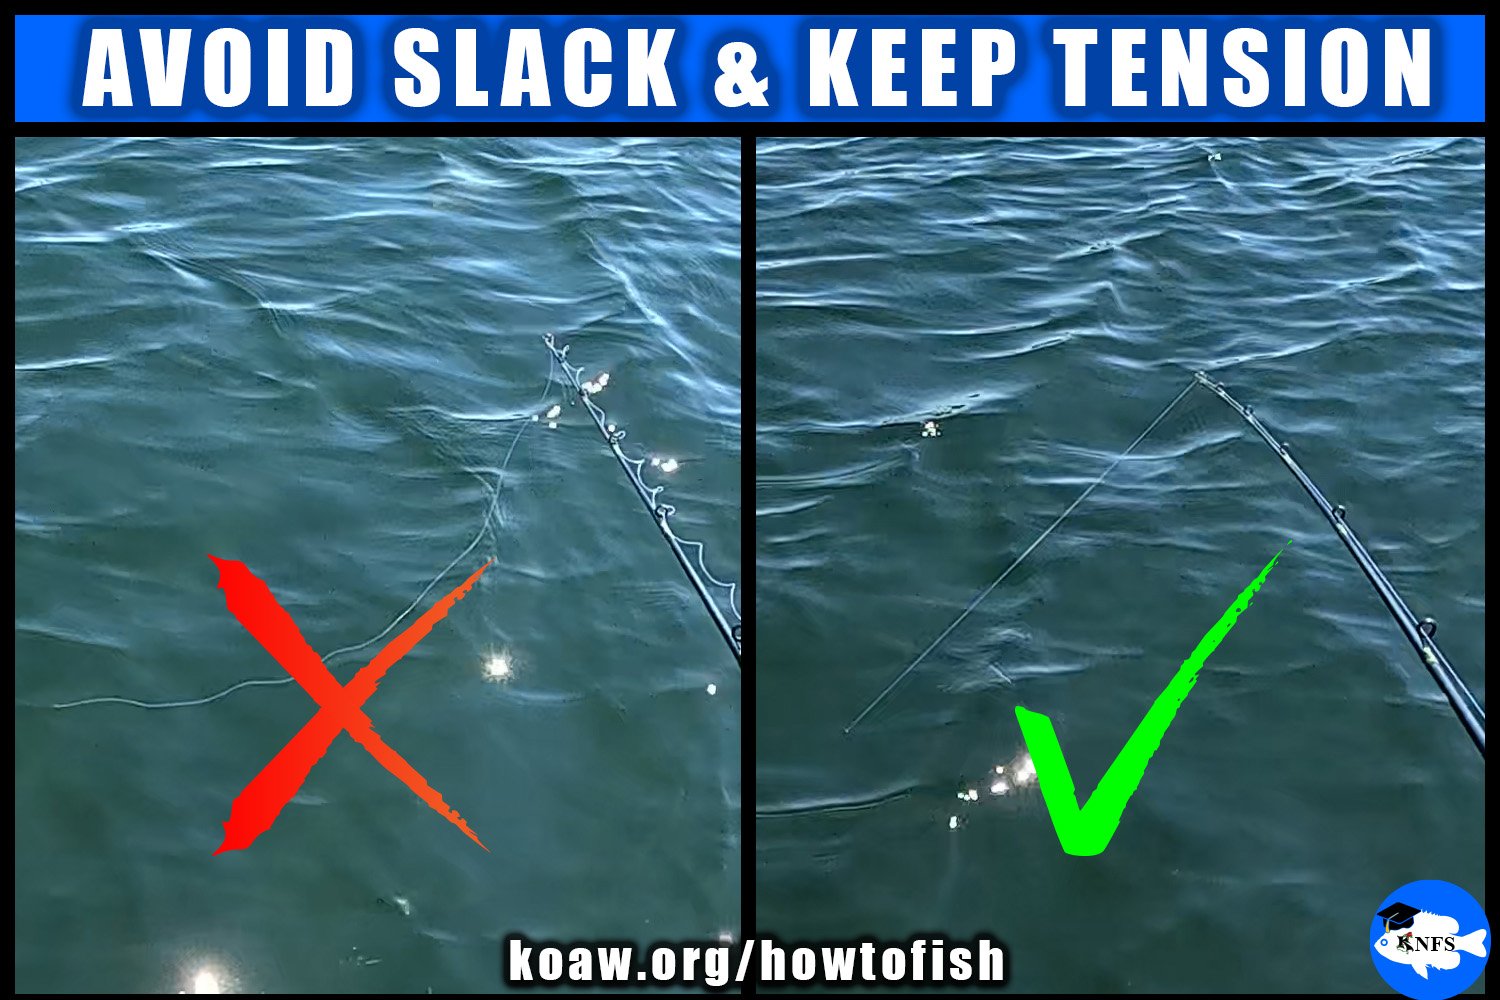
When setting the hook and playing the fish, avoid slack in the line.
Perhaps the most challenging aspect of the float rig is setting the hook.
IMPORTANT: Set the hook ONLY when you’ve removed slack from the line.
Slack line is any line that is not tight.
Float rigs tend to build up slack and that’s okay.
Set the hook once you’ve removed slack and if you can feel the fish pulling back.
What is your hook type?
Did you put on one of the mostly self-hooking circle hooks I recommended?
These hooks only require a gentle pull to set the hook.
Other hooks may require more of a quick jerk to set the hook.
TWO EASY METHODS TO PLAY THIS RIG
PLAY STYLE #1 - Cast & Wait
Simple cast the rig to a desired location and wait to see if any strikes occur.
Typically, if targeting small to medium species, wait 2-3 minutes in one spot before giving up on that spot.
If no strike occurs, cast your rig to another location about 10 ft (3 m) away.
Move the rig until you find an area that receives strikes.
PLAY STYLE #2 - Slow Retrieval
Retrieving the rig slowly involves slowly cranking the handle to bring the rig in.
Cast out the rig.
Slowly crank the handle of the reel.
Every 3-5 cranks, wait a second or two.
The cranking of the handle
The rest is on you to gain your own experience and skillset to capture fish!