Offers excellent control during casting and retrieval.
Great cast accuracy and cranking power.
Difficult to master.
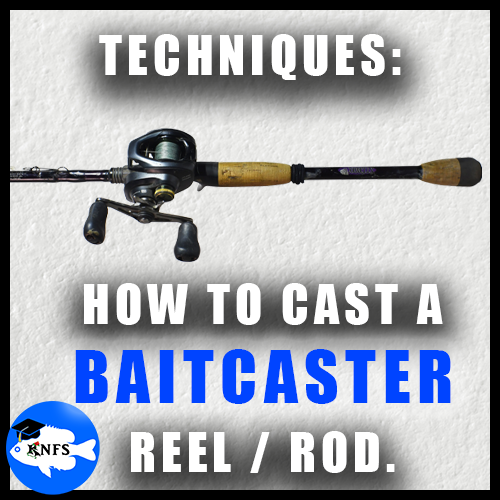
A baitcaster (baitcasting) reel is operated correctly when the reel is above the rod. We’ll be discussing steps to cast a baitcaster reel and rod where the handle of the reel is cranked with the right hand and the main support of the rod/reel is held with the left hand during retrieval. In this holding position, the reel is a right-handed baitcaster, of which, is the most commonly utilized on the market. Some anglers, like me, prefer left-handed baitcasters; the adjacent image is displaying a left-handed baitcaster reel.
Fishing with a left-handed baitcaster requires the same steps taught in this lesson, with slight reversals to what hand/arm does what.

Unlike most spinning reels, the handle is not interchangeable on most all baitcaster reels, as in, an angler cannot change the handle position to the left side on a right-handed baitcaster.
A baitcaster rod is designed to take both a right-handed and left-handed baitcaster reel.
We’ll be discussing the most commonly encountered designs of the baitcaster reel on the market where the spool release button/clutch bar is presented as a button in the middle-rear of the reel housing. Also, we’ll be discussing baitcaster designs that do not have complete built-in mechanical braking and require an amount of manual braking via the thumb.
Disclaimer: Casting sharp hooks and swinging rods can be dangerous and should be done at your own risk. There is always potential risk of incurring harm to your body and the bodies of people near you when fishing, even if all precautions are followed.
QUICK STEPS TO CAST WITH A BAITCASTER REEL & ROD (or more detailed steps below):
QUICK STEPS:
With the hand holding the rod/reel, put pressure from the end of the thumb onto the fishing line on the spool.
Use the back portion of the thumb to click the spool release button (also called the clutch bar, or imprecisely, the bail).
While keeping thumb pressure on the line, rotate your shoulders, hips, and rod-holding arm to move the rod behind you towards the side (for sideways casting, one-armed casting).
For more power and control, use the other hand to grab the base of rod’s handle (two-armed casting.)
Accelerate the rod from behind you towards a direction in front of you aiming the rod tip to where you want your cast to be.
Release the thumb pressure from the line on the spool just before your rod tip is fully in front of you and aiming at where you want your cast to be.
Keep your thumb above, but not yet touching, the spool as the rig extends towards the desired spot.
As the line releasing from the spool begins to slow, apply gentle pressure to the line on the spool to assist in braking. (Very similar to how gentle pressure is applied to a car’s brake to come to a gentle stop, rather than pressing very hard on the brake pedal to come to a jerky, fast stop.)
Once the rig hits the water, remove your thumb pressure from the spool while simultaneously cranking the reel handle to reengage the spool and retrieve line
Click to enlarge.
QUICK TIP: Consult your reel’s manual to learn the reel’s distinct functionalities, adjustable features, and maintenance requirements. Just keep in mind that a reel cannot offer an angler maximum efficiency unless the angler knows how to tweak all that needs tweaking.
DETAILED STEPS TO CAST WITH A BAITCASTER REEL & ROD
PART 1: The Pre-Cast
1.1 Ensure all is where it should be:
Ensure that the line is threaded correctly from the reel and through all the eyelets of the rod.
Ensure that the line is passing through the level wind guide on the reel as this allows for the line to evenly distribute along the spool during retrievals.
Ensure that the line is not tangled or showing knots anywhere from the reel to the very tip of the rod.
Ensure that the reel is housed securely into the seat of the rod. Often there is a twist mechanism to rotate for tightening.
Ensure that the rig (lure/bait/hook) is firmly attached to the fishing line and is not tangled.
1.2 Check friction settings (main drag):
With the spool release button not pressed (also called the clutch bar, or imprecisely, the bail), use a hand to hold the handle of the rod and the other hand to pull on the line away from the reel with a gentle force that precedingly becomes more force.
Line should be releasing from the spool with some resistance.
Breaking the line is NOT the goal here.
The goal is to make sure that the line will not break and that there still is some resistance should a fish become hooked by the rig.
The force needed is mostly dependent on the line strength as well as the type of fish being targeted.
For example: Targeting a fish that weighs 25 lb with 6 lb test strength line would require a fairly loose drag so that the force the fish exerts during a fight does not exceed the line’s capabilities.
Avoid wrapping the line around your hands.
Avoid pulling so hard that you could cut your hands.
The drag should be tight enough so that there is some resistance but begins releasing line from the spool well before the line would break.
If using light line, like 4 lb test, the application of force should be very minimal.
Stronger line can take more force.
Typically, on baitcaster reels pushing the drag knob away from you will tighten the drag and pulling the drag knob towards you will loosen the drag.
1.2 Drag continued:
If the drag feels too loose, then tighten the drag knob, a component often existing as a star drag knob on a baitcaster reel. If the drag feels too tight, then loosen the drag knob.
The drag knob on most baitcaster reels is on the side of the reel between the handle and the main housing of the reel.
Consult the manual of your reel if you are unsure where you drag knob is.
Play around with your drag to determine which direction tightens the drag and which direction loosens the drag.
Knowing how to adjust your drag during a fish fight is definitely an expert skill, and not one I’d expect a new angler to take on. However, I’m emphasizing now that building a habit of reactionarily knowing which way to turn your drag to tighten or loosen the drag force will make you a better angler.
1.3 Check friction settings (casting knob):
Play with your baitcaster’s casting knob to determine which way tightens and which way loosens the immediate frictional forces.
By rotating the handle, reel in an amount of line so that the rig on the end of the line is about 1 ft/30 cm from the tip of the rod
or, if the rig is already to close to the rod tip, release line by applying pressure with your thumb on the line on the spool, clicking the clutch bar, and slowly releasing pressure with your thumb to allow line out until there remains about 1 ft/30 cm of line from tip of the rod to rig.
Hold the rod horizontally in front of you.
Apply thumb pressure onto the fishing line on the spool.
Press the spool release button with your thumb and gently release pressure to see how fast the rig falls.
If the rig and line seem to want to fall very fast, tighten the casting knob.
Careful! Do not release all of your thumb pressure to allow the rig to fall very fast.
A heavy rig that wants to fall very fast could potentially cause the spool to spin too fast and out-of-sync with the line on the spool, tangling the line, also known as a backlash or bird’s nest.
If the rig and line do not fall then the frictional forces are too strong.
Either the friction force of the main drag mechanism is too tight
and/or the casting knob is set too tight
and/or there is a snag/tangle in the line somewhere.
As your thumb releases pressure, the rig should fall fairly easily but with some resistance, as in, it falls slightly slower than if you were to just drop the rig from your hand, allowing gravity to do unimpeded work.
First adjust the casting knob (consult your reel’s manual if you cannot find the casting knob).
The casting knob, sometimes called the spool tension knob, applies force to the spool. Play with the casting knob to see if you can get your rig to fall with just a bit of resistance.
The spool needs an amount of tension on it during the cast otherwise the spool spinning and the line leaving the spool will be out-of-sync.
Adjusting the casting knob needs to be done anytime a new rig is attached to adjust for the new weight.
If, after adjusting the casting knob, you still can’t get the rig to fall when the clutch bar is pressed, then the main drag is too tight. Readjust the main drag to be looser.
FIXING A BACKLASH: Fixing a bird’s nest, or backlash, or spool tangle, is inevitable for anyone using a baitcaster reel. Even a lifelong angler might experience a backlash from a sudden change in wind during a cast. If the drag settings are good, the backlash won’t be so bad.
Frequent backlashes usually means:
Either the reel needs frictional adjustments (casting knob and main drag) and/or
the angler is forgetting to thumb brake and/or
the reel is experiencing mechanical failures from faulty parts.
If a backlash is so bad that it cannot be fixed, the line will need to be systematically cut. If cutting the line, do it piecewise, attempting not to accidentally cut any good line below.
Adjusting the drag is a skill learned with experience:
Adjusting the main drag and casting knob is a guessing game for a new angler. Just play around with it until you begin to understand what changes you make to the knobs changes how the rig falls and how easily the line is pulled out.
Most anglers do not physically measure their drag to determine what settings they would like to use. Also, keep in mind that there are a number of other braking mechanisms built into baitcaster reels, some reels even have electronic components for automatic braking.
You will want to consult your baitcaster reel’s manual to see what under-the-cover braking adjustments can be made to fit your casting preferences.
Eventually, if you’re willing to study your reel’s manual, you’ll learn how to fine tune your reel exactly the way you want it. Some anglers will have setups where the casting knob can be set extremely loose because they have precise understanding of their braking system. However, start with a tighter frictional force on the casting knob to help prevent backlashes, those tangles of line on the spool that result from uncoordinated line release and spool rotation. Yes, a tighter frictional force means less casting distance—but backlashes take time to undo and just aren’t fun.
1.4 Prepare the rig:
Double check that the rig will fall with some resistance when hitting the spool release button.
Double check that the rig is not tangled and there are no line tangles from the reel to the rod tip.
Finally, reset the rig so that there is about 1 ft/30 cm of line from the tip of the rod.
1.5 Check surroundings to find a lane:
Make sure that you will have enough clearance to cast without hitting any other item and/or person.
While holding the base of the rod, extend your arm and rod out behind you, to the side, and in front of you to ensure your lane is clear. If the lane to cast is not clear, find a place to cast from without obstacles.
Casting against the wind with a baitcaster is generally NOT a good idea, especially for an angler learning this reel type.
SIDE NOTE ON AN INEFFICIENT HABIT: A curiosity of many anglers using right-handed baitcasters is that they will cast with their right arm being the main ’workhorse’ and then switch the rod/reel over to their left arm to begin cranking with their right hand. This practice is inefficient. (See the adjacent image.)
Nick (on the left), who is an absolute champ as an angler, casts with a couple extra steps compared to me (on the right.) When teaching young kids, avoiding this inefficiency should be implemented. For adults that may be stuck in ways of preference, the impact is so minimal that it doesn’t really matter too much.
Like the aforementioned right-armed casters, I prefer to use my right arm to be the main power for launching and guiding my cast. Like most users of right-handed baitcasters, I am naturally right-handed; I write with my right hand. By using a left-handed baitcaster, I don’t need to switch the rod/reel from the arm that powered the cast before I begin my retrieval by cranking with my left hand. Instead, my retrieval is a fluid transition from casting to retrieving.
I encourage any angler not yet set into this habit to avoid this inefficiency by training the hand on the non-preferred casting arm to be the cranking hand. Granted, this inefficiency is not really anything to worry about. Any lifelong angler who does this would tell you the same thing. Even many professional tournament anglers maintain this casting inefficiency and do just fine.
PART 2: THE CAST
We’ll discuss sideways casting with the right-arm, as opposed to other methods such as over-the-head, backhand casting, and flipping. Once you can master sideways casting, you’ll be ready to add more ways to cast to your repertoire.
2.1 Pick your spot.
With the rig dangling about 1 ft/30 cm (or even up to doubly more but not less), evaluate your casting lane in front of you.
Decide where you want your rig to end up. How far is it going? How much force will you need? Where is the wind blowing from?
2.2 Put pressure on the line.
Use the front of your thumb on the hand holding the rod/reel to put pressure on the line on the spool.
2.3 Click the clutch bar (spool release button).
Click to disengage the spool release mechanism with the back of the same thumb that maintains pressure on the line.
The clutch bar does not need to be held down on most baitcasters. Once clicked, the clutch bar will reengage once the handle is cranked.
2.4 Begin the cast.
Make sure you have stable footing/seating.
While still putting pressure on the line with the thumb, make sure the rest of that hand has a good grip on the reel housing and around the handle.
MORE POWER: If wanting to use both arms to guide a cast, use the other hand to grab the end of the handle. This will also give you more power and control over your cast, especially important when tossing heavier rigs.
Slowly rotate your hips and shoulders behind you so that your shoulder and arm not holding the rod are more in front of you.
Meanwhile, your main rod holding arm and hand are moving behind you and extending outwards.
Slightly bend your wrist backwards.
The upcoming wrist flick offers an extra boost to the cast.
You are now ‘cocked’ and ready to launch your cast
2.5 Launch the cast.
A. In a quicker motion, rotate your hips and shoulders in the opposite direction from your preparation while also swinging your arm holding the rod towards your picked spot.
Your wrist will be extended backwards for an upcoming flicking motion.
Your other wrist, if holding the rod, will follow suit in a similar flicking motion.
B. Begin flicking your wrist as the rod tip approaches the final moments of where you will stop and point your rod tip (also your thumb) towards your picked spot.
The wrist flick could begin halfway between the ‘cocked’ phase and the stopping of the rod, or more towards the end of the cast.
C. Release your thumb’s hold on the line a split second before stopping the rod’s forward motion.
Releasing of the thumb’s hold on the line on the spool should sync with the end of the wrist flicking forward.
D. Stop your body’s motion to stop the base of the rod.
Your rod tip, thumb, and shoulders should all be pointing towards your picked spot.
The rig is in motion towards your picked spot.
E. As the rig begins to drop, the line will begin to greatly lessen in velocity leaving the spool.
Use the thumb of the hand holding the reel/rod to begin applying gentle pressure to the line on the spool.
This is manual braking to assist the reel’s built-in braking.
Think of this braking process like braking with a car.
You can apply heavy thumb pressure to immediately stop the rig or apply gentle pressure to slowly stop the rig just before it hits the water.
Practice gentle braking as much as possible for smooth stops.
This manually braking is a skill that requires much practice to master.
Forgetting to manually brake, especially on a poorly tuned reel (and/or one without complete built-in braking), will lead to backlashes.
The hand not applying thumb pressure should be moving to towards the crank handle.
During the acceleration moment of the cast, the rod will begin to flex, or bend. The rod is meant to flex in this manner as the rod, in itself, will build energy. When you stop your casting motion, the rod’s flex will release to straighten the rod. In these moments, the rod’s energy will be released, helping the rig fly towards your desired casting spot. The rig will also add an extra boost to the casting distance; this is why the cast is begun with at least 1 ft / 30 cm of line. Try casting a rig where the rig is positioned at the very tip of the rod—the same rig won’t cast as far.
PART 3: THE POST-CAST / RETRIEVAL
The hard part is over, now it’s about bringing the rig in, also called the retrieval.
BIG TIP:
Slack is usually not an angler’s friend.
Avoid slack in the line:
Slack refers to any portion of fishing line that is not tight.
Slack is not an angler’s friend in most situations because:
Slack lessens the reactionary time to set the hook when a fish strikes.
A fish could strike immediately (or even moments before) a rig hits the water.
Remove slack by cranking the handle to bring in line while also pulling the rod upwards.
Removing slack before the rig hits the water is an advanced technique that we won’t cover here; however, I encourage you to practice once you have a better understanding of the other casting mechanics.
The thumb plays an integral role in baitcaster use.
IMPORTANT:
The thumb near the spool has two jobs:
Be ready to apply pressure for braking.
Apply pressure for braking.
The excellent control of the baitcaster is partly contributed to the thumb’s ability to control the line as it leaves the spool. If a fish strikes while the spool release mechanism has been clicked and the thumb is not applying pressure to the spool, then the fish will be pulling on the line with almost no resistance; this will not set the hook and the fish, most likely, will spit the hook. Whether the clutch bar is engaged or not, the thumb should be ready to reactionarily apply pressure to the spool to add sufficient resistance so that the rod’s hook-setting motion will hook the fish.
Play around with this concept to understand what happens when a hook setting motion occurs with the spool release mechanism engaged and disengaged. *
*Be mindful during this concept testing to add some resistance with your thumb on the spool not to backlash!
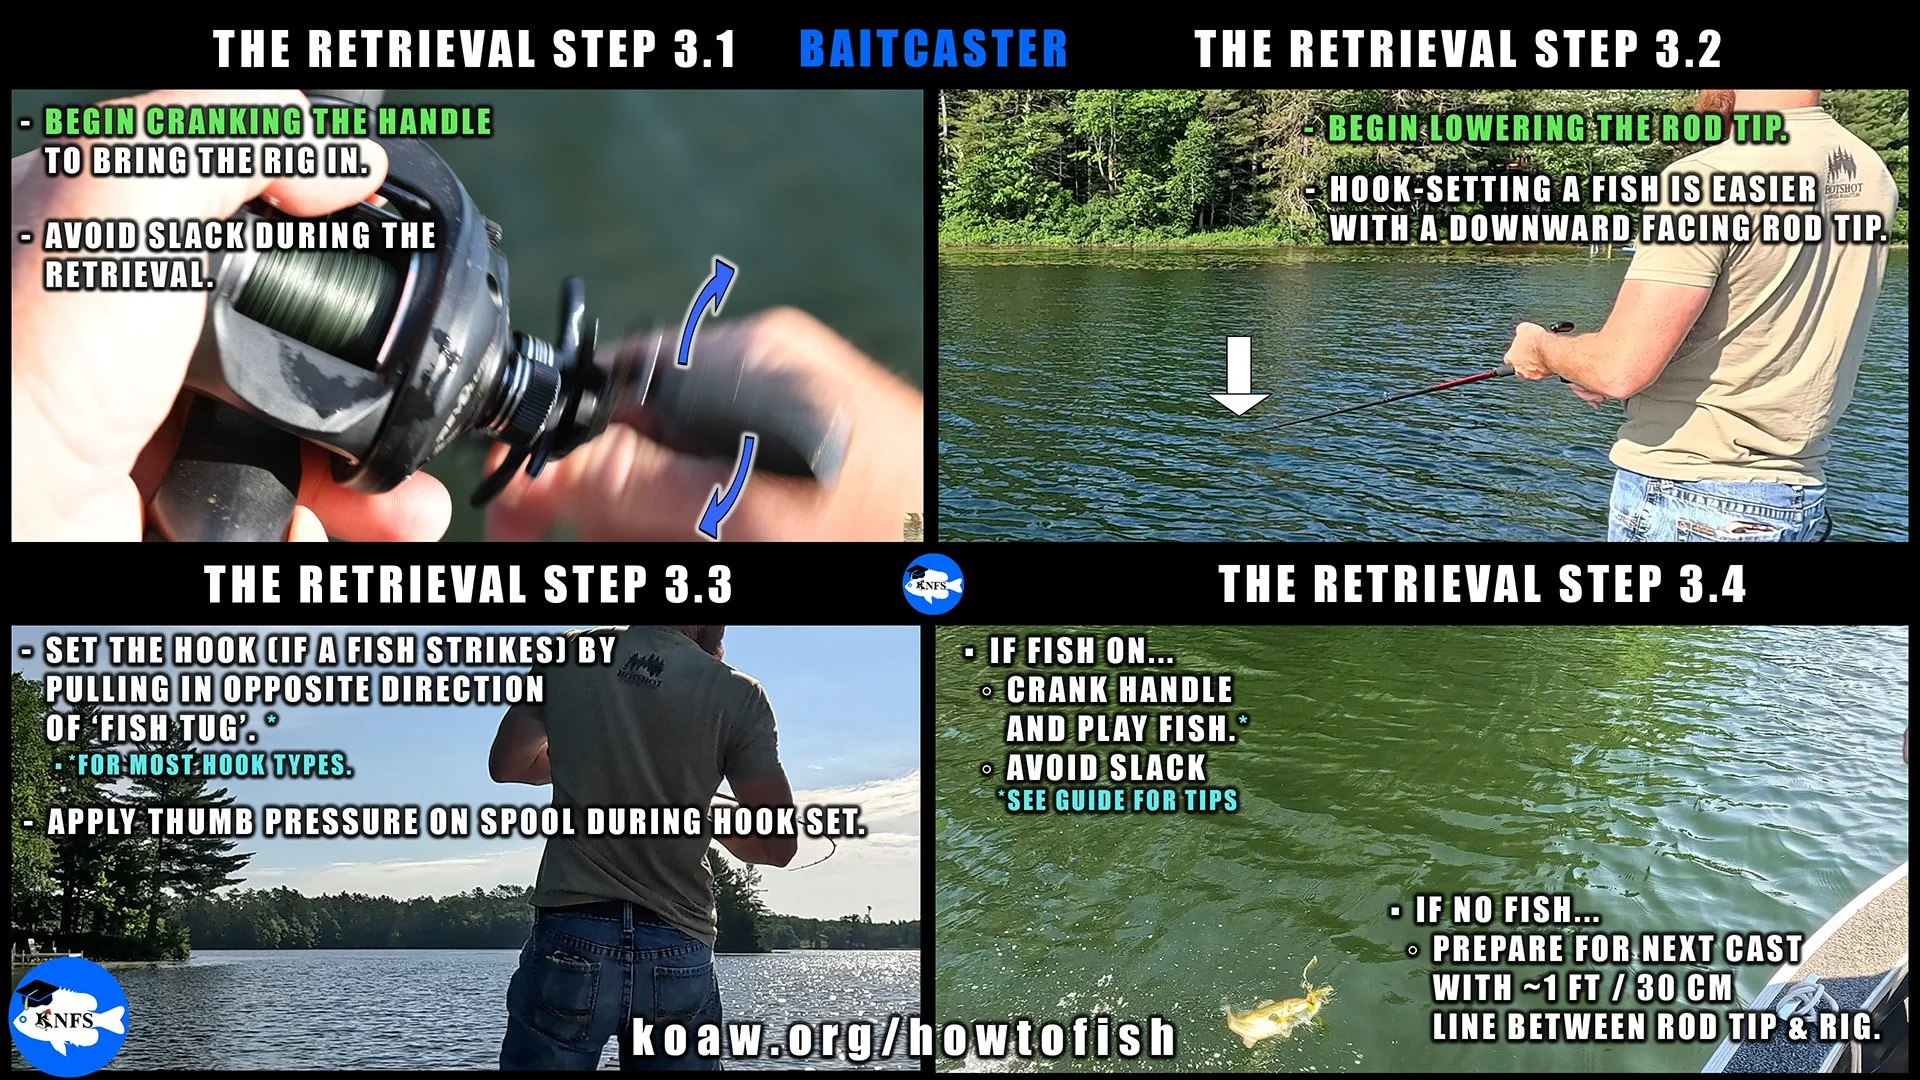
3.1 Begin the rig retrieval.
The rig has just hit the water.
Begin cranking the handle to bring the rig in OR…
…allow your rig to fall deeper into the water.
Remember, the thumb stays above the line to apply pressure should a fish strike as the spool is not engaged with the main friction system (because the handle has not been cranked yet.)
After your rig has fallen to a desired depth in the water begin reeling in by cranking the handle.
The good rule-of-thumb is that 1 second will have your bait fall 1 ft/30 cm, of course, that is entirely dependent on many other variables of densities, rig composition, etc..
By turning the handle, the spool release button (clutch bar) will reset to engage the spool; you’ll hear a click.
3.2 Begin lowering the rod tip.
While cranking the handle for the first moments to begin bringing in the rig also begin lowering the rod tip.
Crank quick enough so that the slack is removed from the line as soon as possible.
Advanced techniques involve removing slack from the line before the rig hits the water. We won’t discuss that here—but keep this in mind as you become more adept with this reel.
In most casting situations the angler should be retrieving with the rod tip facing towards the water so that, should a fish strike, setting the hook is an easier motion.
Exceptions exist, such as, when an angler is trying to fast-play a lure over weeds. In this situation, the rod tip should be held high while cranking the handle rapidly to help keep the rig near the surface.
3.3 Set the hook.
A fish strike, in most situations, feels like something quickly tugging back at the end of the line.
Most casting rigs (because of the hook design) require that the angler sets the hook so that the point of the hook(s) pierces the cartilaginous portion of the fish’s mouth.
Some hooks, like many circle hooks, only require a gentle pressure for a proper hook set.
For these hooks, avoid a strong jerking motion and rather implement a slow pull.
To set the hook quickly lift the tip of the rod in an upwards, opposite direction from where the line is entering the water.
Make sure the slack is out of the line before setting the hook.
A good idea is to also apply an amount of thumb pressure onto the spool during the hookset.
This is very important for a loose set drag and less important for a tight set drag.
If using braided line, remember that this line has less flex than mono and fluoro line; a very hard hookset with braided line when the drag settings are too tight could potentially snap the line.
Setting a hook too softly can mean the hook won’t set.
Setting a hook too hard can tear the hook out of a fish’s mouth.
As a new angler, understanding hook-setting power is something you will have to gain a feel for over time with experience.
Even if you don’t get a fish strike, practice setting the hook during your retrievals.
After a hook-setting motion, begin cranking the handle while also bringing the rod tip down so as to keep slack out of the line and reset the rod to the downwards facing position.
3.4 The final moments.
Should you have a fish on the end of your line then bring it in!
Yes, that is easier said than done with some species. I will have an entire page dedicated to “fighting/playing fish” within the guide.
Your main goal when retrieving the fish is no slack in the line.
Simply crank the handle to bring the fish in. Should the fish be fighting heavily, the drag mechanism should begin making noise to let you know that line is being pulled out. That’s okay—this is why your drag is set loose enough so that the line won’t break.
Some reels have an optional setting that will have the reel make an exaggerated noise to notify the angler that line is being pulled from the spool past the drag setting.
Do not crank the line all the way to the tip of your rod. Leave at least 3 ft / 1 m of line. If the line distance is too short, there is a greater chance that a last fighting effort of the fish will break the line.
Should you not have a fish, simply reel in the rig in while keeping your rod tip pointed at the water.
For most rigs, reel in so that there is still about 3 ft / 1 m of line, and keep the rig in the water.
Some fish will follow the bait in, so make sure you are wearing your polarized sunglasses to see if your rig is being followed. If it is, keep the rig in the water and try to entice that fish to strike.
If you are confident there is no fish, lift your rig from the water and reel in the rig so that 1 ft / 30 cm (or more) of line remains.
You’re now ready to begin the next cast.